Salmon Fried Rice Bowl

I don’t know about you, but I love making bowl for dinner lately. You can add any protein, veggie or starch of choice! They are quick to put together, easy for meal prep and a perfect balance of nutrients.

This Salmon Fried Rice Bowl was made with very quick ingredients . I actually used a frozen blend fried rice and spiced it up. I know some people aren’t for the frozen veggies or canned items that are a short cut but life gets busy and it’s good to have a these items in the freezer for those quick and healthy meals.

Salmon Fried Rice Bowl

Ingredients:

Rice:
1 small yellow onion, diced
6 mini colored peppers, diced
4 garlic cloves, minced
16 oz bag frozen fried rice
2-3 eggs
1-2 tablespoons olive oil or avocado cooking spray
1-2 tablespoons light soy sauce
2 teaspoons onion powder
2 teaspoons garlic powder
sprinkle pepper

Salmon:
1lb salmon, cut into bite size pieces (try and cut around same size for even cooking)
1 tablespoon of olive oil or avocado spray
2 teaspoons chili powder
2 teaspoons paprika
2 teaspoons onion powder
2 teaspoons garlic powder
Sprinkle salt & pepper

Toppings:
Avocado, sliced
Fresh jalapeño, sliced
green onion, sliced
sriracha

Directions: Heat a medium skillet on high heat. Pre-heat air fryer for 4 minutes. In a medium bowl add in the salmon pieces, oil and seasoning. Mix well to make sure salmon is evenly coded. Add the salmon to air fryer pan or basket. Cook at 400° for 8-10 minutes flipping halfway through. (Note: Cooking time will vary based on air fryer and sizes of salmon pieces)

In the heated skillet add the olive oil and let heat for a minute. Next add in the onion, peppers and garlic and cook 2-3 minutes until it becomes fragrant. Add in the frozen fried rice next and cook 3-4 minutes. Mixing often to avoid sticking. Season the mixture with seasoning (add other flavors if you’d like) and drizzle in soy sauce and let cook another few minutes. Make a well in the middle of the rice, add in the eggs and scramble. Let cook 1-2 minutes and then mix all the rice together.

To assemble the bowl add the fried rice to the bottom and top with the salmon bites. Add your desired toppings. I used avocado, green onion, jalapeño and sriracha. Enjoy!


Greek Chicken Bowl

I’m always trying to create healthy quick meals. Life can get crazy especially during the week so having a healthy meal you can partially prep ahead of time and put together quick is a good healthy alternative to take out!

This bowl can be adjusted to any specific flavors or food lifestyles. A Must try!

Greek Chicken Bowls

Ingredients:

Chicken:
1lb chicken breast or tenderloins
1 cup fat free greek yoguart
1 lemon, juiced
1 tablespoon lemon zest
1/2 tablespoon dried dill
1/2 tablespoon dried oregano
1/2 tablespoon garlic powder
1/2 tablespoon onion powder
Salt, to taste
Pepper, to taste
3 garlic cloves, minced
1-2 tablespoon, red or white wine vinegar
2 tablespoons olive oil

Salad:
2 cups tomatoes, diced
4 mini cucumbers, diced or cut in half moons
1 red onion, diced
2 garlic cloves, minced (or garlic paste)
1/2 cup Kalamata olives, sliced
1/4 cup extra virgin olive oil
1-2 tablespoons red or white wine vinegar
1/2 tablespoon oregano
salt, to taste
pepper, to taste

Bowl:
Cooked rice
1 cup tzatziki sauce
1/2 cup crumbled feta cheese

Pita Chips:
3 pitas, cut in triangles (I used a low carb high fiber option)
2 tablespoons olive oil
2 teaspoons oregano
2 teaspoons garlic powder
sprinkle salt and pepper

Directions: In a medium bowl add the Greek yogurt, lemon juice, lemon zest, garlic, spices, vinegar and olive oil. Mix well till fully incorporated. Add the chicken to a large gallon zip lock bag (or a bowl) and add in the Greek yogurt mixture. Mix all together until the chicken is fully coated. Marinate 3 hours or overnight.

To make the salad add all the salad ingredients to a medium bowl with the seasonings. Add more or less to your liking. Start with less vinegar and add more if needed. Make the salad ahead of time and let chill for 1-2 hours. This will help marry the flavors.

To make the pita chips drizzle with oil on both sides and sprinkle with seasoning. Place in heated air fryer at 400° for 8-10 minutes flipping halfway through. Make sure they start to get crisp, set aside. Note: they will crisp more once out of the air fryer.

The chicken can be cooked on the stove, baked, grilled or made in the air fryer. I used chicken tenderloins and cooked at 375° for about 10 minutes flipping halfway through in my oven air fryer. Chicken must be cooked to an internal temperature of 165°.

To assemble the Greek Chicken Bowl add you’re cooked rice (or a low carb alternative) top with chicken and add the salad on the side. Top with tzatziki and feta cheese.

Chef Notes: If you prefer chicken thighs you can easily swap out the chicken. If you have a Greek seasoning omit the above spices and use that. YUM! I have made this with low carb alternatives like cauliflower rice and low carb pita. Add extra cooked veggies for more volume.

Lemon & Garlic Baked Lobster Tails

It’s been forever since my last post. I’ve got so much to catch up on but I’m working on it slowly!! Life’s been a little hectic the last 4 months! I made these lobster tails for my Mom, who LOVES her lobster. I try and catch lobster tails on sale at my local grocery story and make them often!! These were on the smaller size, only about 4 oz.

There are many ways to cook lobster. I’ve butter poached, grilled, baked and even put in the air fryer! I was making 4 this time so decided to use the oven.

Garlic & Lemon Baked Lobster Tails

Ingredients:
4 lobster tails (about 4-6 oz each),
4 tablespoons butter (I used salted) , melted
2 tablespoons garlic, minced
1/2 lemon, juiced
1/2 tablespoon dried minced onion (optional)
2 teaspoons paprika
2 teaspoons garlic powder
2 teaspoons, onion powder
Salt & Pepper, to taste

Directions:
Preheat the oven to 425°.

Prepare the lobster tails by using the butterfly method. Using kitchen shears cut the shell starting at the opening of the tail. Cut a slit down the tail, stopping before you get to the end. Gently open the shell on both sides and pull the meat out and place over the top of the shell. Complete this step with all lobster tails.

In a small bowl add in the melted butter, spices, garlic and lemon juice and mix well. Add the lobster tails to a oven safe dish. Spoon the butter mixture evenly over the lobster tails.

Bake in the oven for 8-10 minutes depending on the size of the tail or when the lobster reaches 135°-140°. Remove from the oven, serve immediately with melted butter and a lemon wedge and ENJOY!

Chef Notes: If using salted butter be careful of any extra salt so the lobster doesn’t get to salty. Lobster tails can overcook very easily. Make sure to watch them closely as overcooked lobster is rubbery and not pleasant. Change up the seasoning to your preference. No fresh garlic on hand? Garlic paste works just as well!

Mississippi Pot Roast

I just have to share this recipe. I’m sure you’ve seen it all over but it really is an underrated recipe. Until I actually made it, I wouldn’t have believed it would be as good as it was. The Mississippi Pot Roast is a perfect recipe for a crowd. I like to eat it with potatoes or noodles but my favorite was probably on a nice roll or chunk of French bread like a sandwich. Don’t forget to add the juice.

Make sure to give this recipe a try! You won’t regret it!

Mississippi Pot Roast

Ingredients:
3lb boneless chuck roast
1 packet ranch seasoning
1 packet Au Jus mix
1 jar peperoncini or banana pepper rings
1/2- 3/4 of juice from the jar of peppers
1/2-1 stick butter

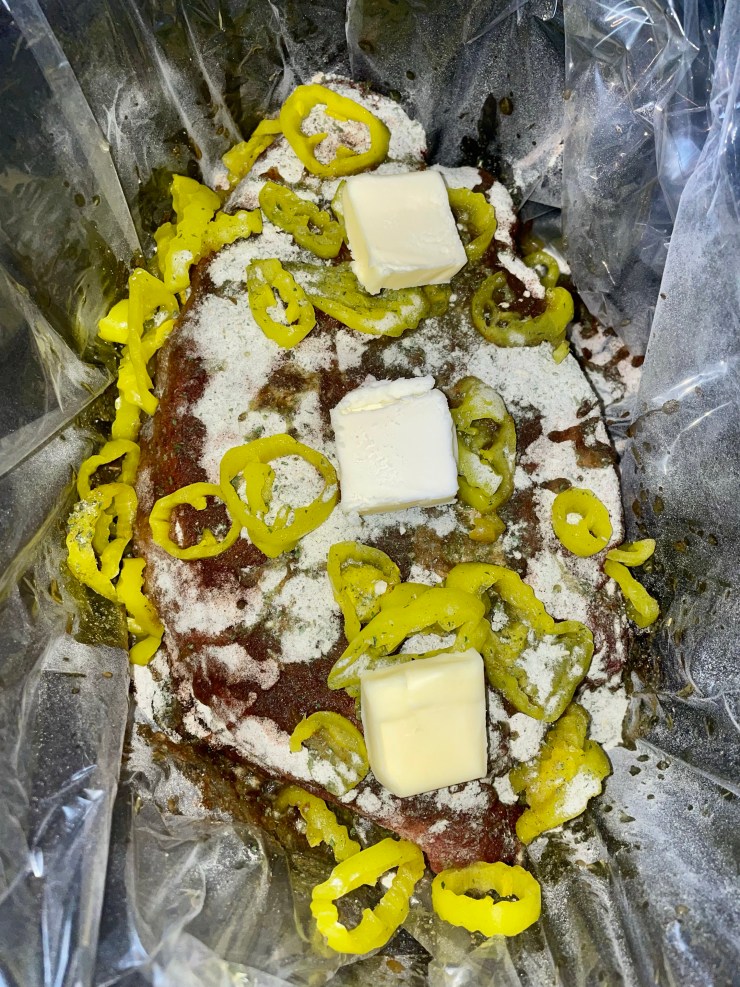
Directions: Add the chuck roast to the crockpot. (Don’t forget the crockpot liners for easy clean up.) Top with the peperoncini /banana pepper rings and the juice. (Note: If you want a milder flavor use mild banana pepper rings.) Sprinkle the meat with the packet of ranch and Au Jus mix. Last step, slice the butter into about 1/2 inch slices and lay over the top of the meat. You don’t need to use a whole stick if you’d rather not, but you do need some butter. This gives the meat a nice brown color and makes it delicious.

Cook on low heat for 8 hours or until the meat falls apart easily. You can test this with a fork. Once meat is cooked, shred the beef and mix. Serve over potatoes or rice or even put on a nice chunk of bread for an amazing dip sandwich. Don’t forget the juice!!

Chef Notes: It’s always good practice to brown the meat before it goes in the crockpot. I’ll be honest, I rarely do this. I never seem to remember and I’m rushing to put together in the morning. For this recipe it’s not a big deal as the butter on top really helps brown the meat. This meat freezes very well and left overs are delicious! Enjoy!

Baked Italian Meatballs

Italian Meatballs are really simple to make and you really add any flavors you want! I’m Italian and I learned a lot from seeing my grandparents cook when I was very young and also from seeing my parents cook as well. Italian meatballs are really easy to make, there is no need to buy the store bought ones! You can put this recipe together in now time!

This recipe is a pretty basic Italian meatball recipe! I used ground beef as it was all I had but you can use a mixture of ground beef and ground pork that also comes out delicious! My grandmother use to fry the meatballs, but to make these a little healthier I bake them! You can simmer these meatballs in sauce, enjoy with pasta or eat them on their own. I personally eat them with a little drizzle of oil and some delicious shaved Italian cheese with a chunk of bread! Yum!!

Baked Italian Meatballs

Ingredients:
2lb ground meat (beef or a mixture of beef & pork)
2 eggs
1/4 cup milk
1/2 cup Italian breadcrumbs
1/3 cup grated Romano cheese
1 Tbsp Italian Seasoning
1/2 Tbsp Garlic & Herb Seasoning (See below for Amazon Link)
2 tsp salt
2 tsp pepper
4 garlic cloves, grated
1 shallot, grated
2 tsp olive oil

Extras:
Olive oil cooking spray

My Favorite Amazon Items: https://www.amazon.com/shop/garlic_and_oliveoil_veins

Directions: Preheat oven 375°. In a medium bowl add all the ingredients above and gently mix with your hands (Yes, your hands) until everything is fully mixed together. Do not over mix the meat, this is important to keeping a moist meatball.

Next grab a few pinches of meat and form your meatballs. Don’t overly work the meat mixture. You want to just gently roll into balls. Make the meatballs any size you want. Add the meatballs to a greased cookie sheet leaving a little room in between. Bake in the oven for 25-35 minutes until fully cooked through. There is no need to flip the meatballs during the cooking process. Adjust the cook time based on the size of the meatballs. Enjoy the meatballs with pasta, simmered in sauce or just on their own!

Smashed Potatoes (Air Fryer Recipe)

I’m potato lover!! I love any and all potatoes. I love cooking with potatoes because there are so many ways you can make them! Mashed potatoes, roasted potatoes, gnocchi, pancakes, baked the options are endless! I’m sure you’ve seen smashed potatoes! They are so simple to make and these are even easier than normal! I actually par cooked in the microwave! I didn’t have time to boil the potatoes first so decided to cut down on the time and throw them in the microwave! If you have the time, you can definately boil the potatoes first, but honestly I’ve done it both ways and didn’t notice a differenace.

Use any seasoning of your choice! Here’s the link to some of my favorite! https://www.amazon.com/shop/garlic_and_oliveoil_veins

Give these smashed potatoes a try and let me know how they you like them!!

Smashed Potatoes (Air Fryer Recipe)

8-10 baby potatoes, (I used Baby Dutch Yellow Potatoes)
2 Tbsp olive oil
1 Tbsp Ranch seasoning
1 Tbsp garlic & herb seasoning
salt/pepper, to taste

Directions: Rinse potatoes under water and remove any dirt. Add the potatoes to a microwave safe plate and cook on high 5-6 minutes until tender. Add the potatoes to air fryer rack. Using the bottom of a heavy glass press down smashing the potatoes. Next drizzle olive oil and season both sides of the potatoes. Preheat the air fryer. (Note: My air fryer preheats at 400° for 4 minutes.) Next add the rack to the top of the air fryer and cook at 400° for 10 minutes, flipping half way. Add or reduce time depending on your desired level of crispiness! Personally, I like these smashed potatoes nice and crisp! Remove from the air fryer and serve with sour cream for dipping or any dip of your choosing or just enjoy on their own. Enjoy!!

.